
The tutorial to help you install your wheel tapes like a pro!
Have you heard of wheel ribbons (or liserets)? They're self-adhesive strips that can be installed on rims to give your bike a nice aesthetic touch, for a modest price. What's more, most of them are retro-reflective, making you more visible at night! You can install them all over your bike, and even on your helmet if you like! However, I can't guarantee that they'll look good.
Personally, I've put them on almost every bike I've ever owned. On the other hand, I remember the first few times when I lacked patience and practice and the result was very average because it didn't draw a perfect circle... So here's a little tutorial, which will be useful if you want to get a decent result!
I don't think you can hurt yourself installing these ribbons... but I have dropped a bike (true... at the same time, with 2 left hands, it's not surprising). So keep women, children and animals away before you start!
Equipment:
- A motorcycle with wheels. In my case, the Boss's Triumph Street Triple.
- A roll of motorcycle wheel tape. We chose Motrax WHEEL STRIPES 5 mm, because the fluorescent orange color was very similar to our Street Triple (also available in 7 mm). Ixtem Moto's MAD Wheel Tape has an applicator (which makes installation easier, but still requires vigilance) and is available in 7 colors.
- A cleaning product (for me: Motorex disc cleaner),
- A pair of scissors.
- If you have: workshop crutch(s)... failing that, a pack of beers to relieve the stress.

1- Preparation
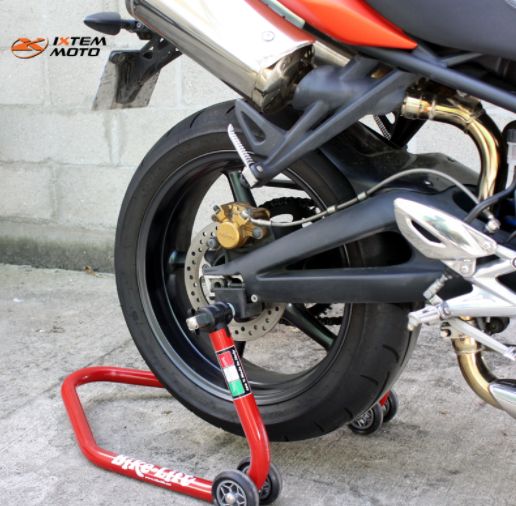
As you can see, we strongly advise you to be able to turn the wheels during installation. This will make installation much easier, and will greatly improve the finish (experience). In my case, I used our Bike Lift workshop stand for the rear wheel.
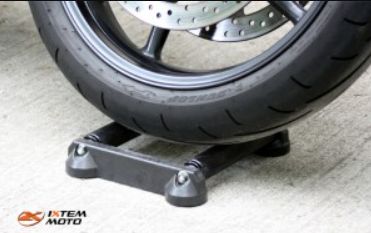
and the TG Easy Clean maintenance wheel for the front wheel.
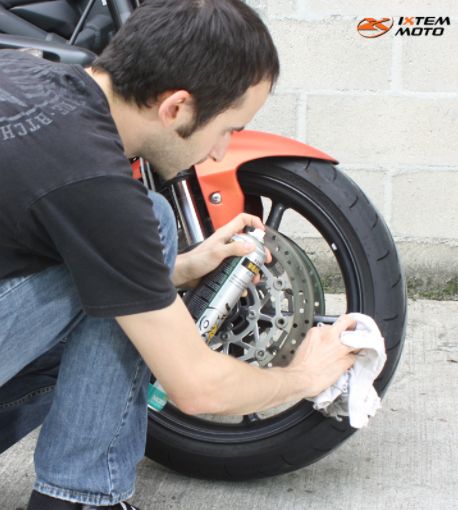
2- Cleaning
Clean and dry your rims as you're used to doing ("What?! Don't you ever do it?!"). The rim surface must be perfectly clean and non-greasy. I use my brake disc cleaner spray, which is an excellent degreaser.
3- Installation
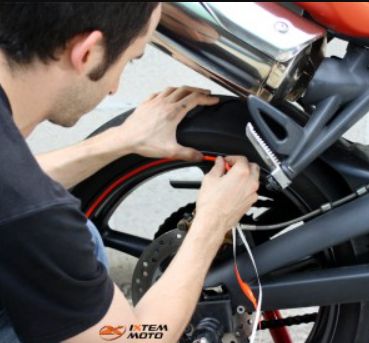
First of all, wash your hands. Because if you get grease on the sticky surface of the tape... well, it won't stick.
Peel off the first 2 cm of your roll and place it correctly on the edge of your rim. As I said, we tend to run out of patience very quickly...
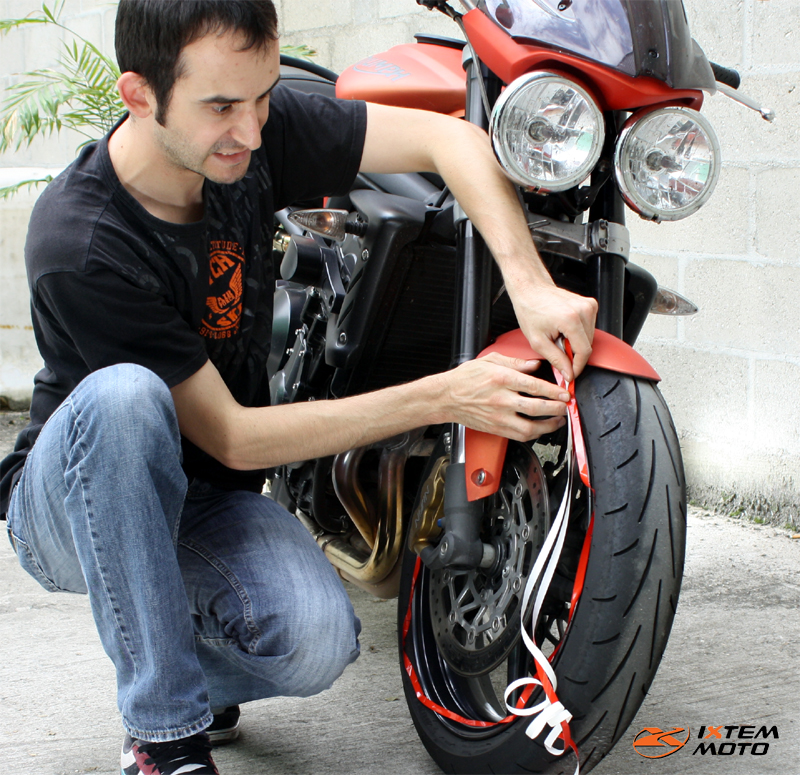
Bear in mind that one roll is just long enough for 2 17" rims (give or take a few centimetres). So you don't really have the right to make a mistake (or else you'll have to buy a 2nd roll). The beginning of the installation is important, as you'll need to place the tape in the same way all around the rim, to obtain an almost perfect circle. If you go too fast, it will look ugly! Don't put too much pressure on the tape when applying it, so that you can peel it off slightly if necessary.
Don't pull too hard on the edging as you install it, as some are fragile and can tear easily. As soon as you see that you're starting to feel uneven, stop immediately, gently peel off the "messed-up" part and replace it.
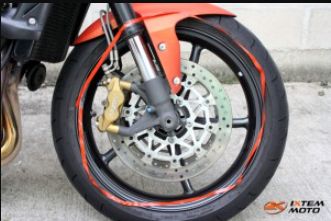
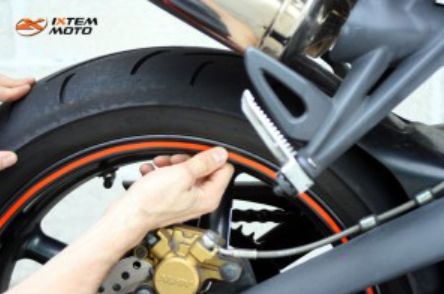
As soon as you've gone around the rim, keep 1 cm more than necessary, then cut the tape before gluing this last centimetre to the beginning of the ribbon.
4- Control
Run your finger along the entire length of the tape, to optimize bonding and check for air bubbles underneath (which can easily happen with edgings over 7 mm wide).
It's as simple as that... well, for me it was all right, because I had a workshop stand and a TG Easy Clean roller. For those who aren't so lucky, you'll have to be even more patient and be careful not to damage the tape every time you move the bike. In any case, the result is there!

")
")
Our last posts
#interviewmotarde #etonvaoumaintenant #motardevoyageuse #voyagemoto
#hivernale #millevaches #équipementmotard #aventuresmichel
#aventuresmichel #hardefitour #raidenduro #tout-terrain
Aucun produit